
Windows 365 is a relatively new cloud service from Microsoft. After Office 365 and Microsoft 365 SKUs that provide full set of productivity apps, as well as management tools, Windows 365 provides a cloud PC that you can connect to and use from any place. This PC is joined to your Azure AD, your local AD DS or, in some scenarios, to both.
Windows 365 comes in two SKU options – business and enterprise. While business version is pretty simple to configure and provision (you basically just need to associate a license to a user and sign in to windows365.microsoft.com), if you choose Enterprise SKU you will need to invest some more time to have things up and running. Main difference between business and enterprise version of Windows 365 is in provisioning and management approach. While business version is being provisioned automatically by Microsoft, without many options to configure, for enterprise version you need to use Endpoint Manager and configure provision policies. After provisioning, enterprise version of Windows 365 will be fully managed by Endpoint Manager. But that’s not the only difference. For enterprise version, you also have the ability to perform hybrid to your local AD DS, and be able to access both on-premises and cloud resources with same set of credentials and from same cloud PC. That’s actually a scenario that provides full benefits of having cloud PC.
Having a single Windows PC in cloud, joined to both AD DS and Azure AD, with ability to access both local and cloud resources can be a great benefit especially for companies that don’t have remote access solutions in place, and have resources stored both locally and in cloud. Let’s see what we need to have to implement Windows 365 in such scenario. First, you need to choose and purchase appropriate license. Windows 365 Enterprise is available in Basic, Standard and Premium SKUs. Basically, these SKUs differ in hardware configuration and supported software, but from provisioning and management aspect they are the same. After you purchase a license, you need to assign it to the end user. You can use Azure AD or Microsoft 365 admin center for this, in the same way as for any other license.
Now you need to include Endpoint Manager. To implement Windows 365 Enterprise, it is not enough just to assign license. To provision a Windows 365 PC, and be able to perform hybrid join to both your local AD DS and Azure AD, as well as to access both on-premise and cloud resources, you need to configure several items.
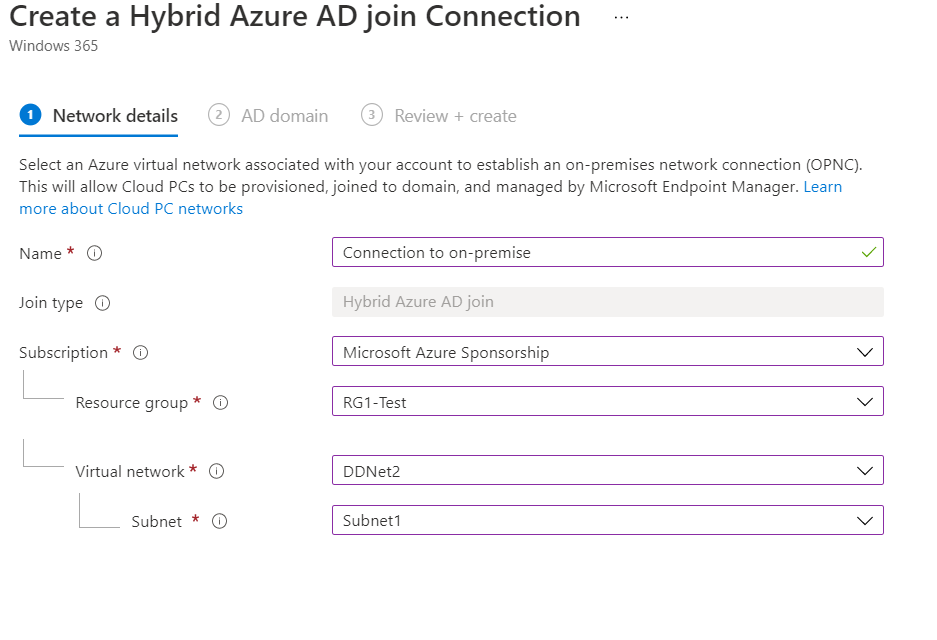
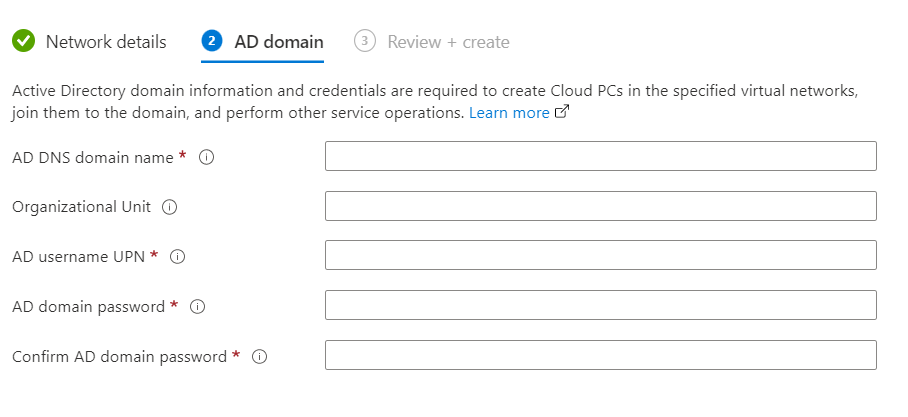
When you navigate to Devices section in Endpoint Manager in the left pane you will see Windows 365 in Provisioning section. When you click on Windows 365, several new tabs will appear on the right side. First, and most important, is to create on-premise network connection. This is mandatory. You need to assign existing Azure virtual network, that can be used to communicate with your on-premise environment as well as with your cloud resources (such as VMs in Azure and similar). You can’t use Endpoint Manager to create such network. This virtual network must already exist, and you need to use Azure portal to create it. In the Endpoint Manager, you only need to select appropriate Azure subscription, Resource group, virtual network and appropriate subnet within virtual network. After that, you need to provide admin credentials for your local AD DS and let Endpoint manager perform several checks to ensure if this network can be used for Windows 365 purposes.Most deployments fail on this step of checking virtual network capabilities, so let’s dig in to that a bit deeper.
To properly prepare virtual network for Windows 365 Enterprise deployment, you need to clearly understand requirements for this virtual network. Let’s imagine a typical scenario – you have local AD DS with two domain controllers, a file server and few other resources. You also have an Azure tenant with few VMs or other resources, as well as Microsoft 365 tenant used for productivity services. We need to deploy Windows 365 PC so the user can access all these resources by signing in just once.
First, we need to have a connection between on-premise and Azure resources. In most cases, this is done by deploying site-to-site VPN in Azure. For that, you need to create virtual network gateway in Azure, and configure site-to-site connection object to your on-premises network. In most cases, this is not very complex task to do, as Azure supports most common site-to-site VPN configurations. You’ll also need to create local network gateway object, to define address space (public IP) of your on-premise environment. After you established Azure site-to-site VPN, you need to connect that object to your Azure virtual network. This will enable devices and resources in your Azure virtual network to communicate to your on-premise environment by using site-to-site VPN between Azure and your local environment.
There is one more important thing you should do on your Azure virtual network. You need to configure DNS servers so that resources located in your Azure virtual network can resolve your local DNS names. This is mandatory for Windows 365 deployment. By default, each Azure virtual network is using Azure provided DNS servers, however, these DNS servers are not capable of resolving your local DNS names, and your network check for Windows 365 will fail. So, you should navigate to your Azure virtual network, then to DNS servers section, select custom and then configure your DNS servers. It is recommended that you configure one public DNS server (Microsoft, Google or something else) and one private DNS server for your local network. Most likely, that will be a DNS server on your AD DS domain controller or dedicated DNS server deployed locally. As a results of proper DNS configuration, you need to be able to resolve your local domain resource from a resource located in Azure virtual network. For example, a VM in Azure virtual network should be able to resolve the name of your local AD DS domain.
After you setup DNS, you need to take care of few more things. Endpoint Manager check will also verify if computer account can be created in your local AD DS. For hybrid Azure AD join, Windows 365 computer account will be created both in your local AD DS as well as in Azure AD. You need to provide appropriate account for this, most likely with local AD DS administrator privileges, but not neccessarily.
Also, you need to make sure that Azure AD sync is in place which means that your local AD DS is synchronized with Azure AD. Only accounts synced from local AD DS can be used for Windows 365 PCs. Checks performed in Endpoint Manager when creating network configuration are shown here:
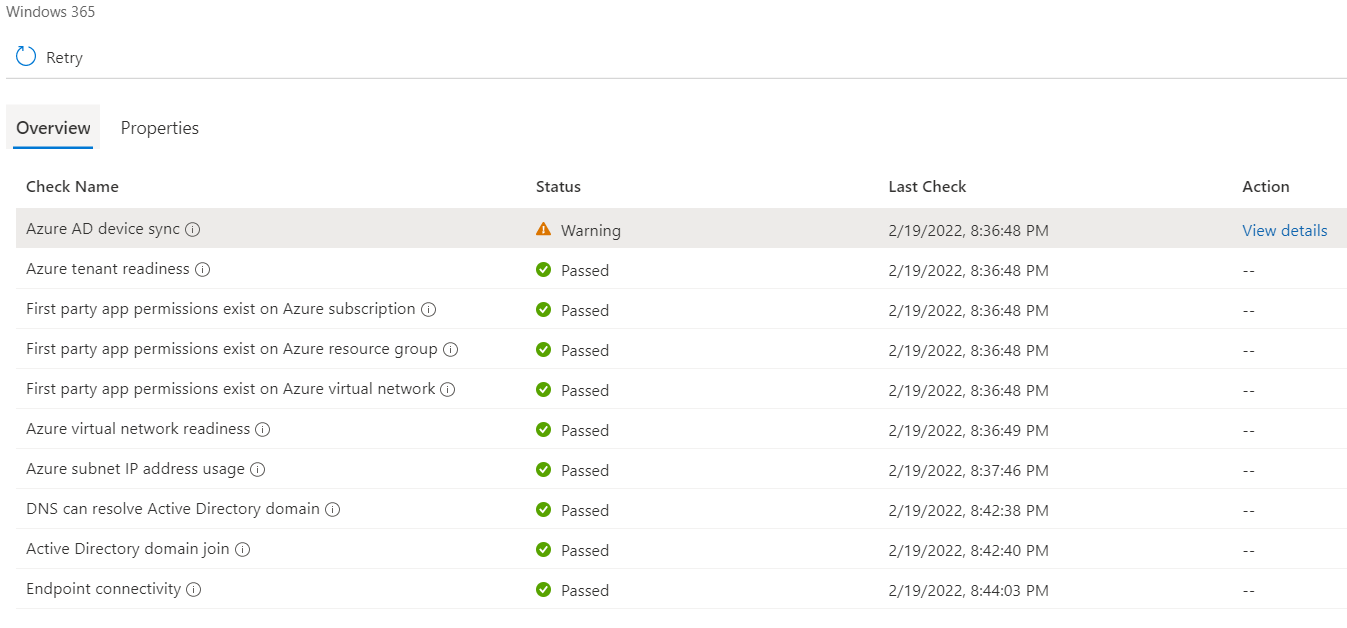
It is ok to have warnings on few places, but you should not have errors, as in that case network cannot be used.
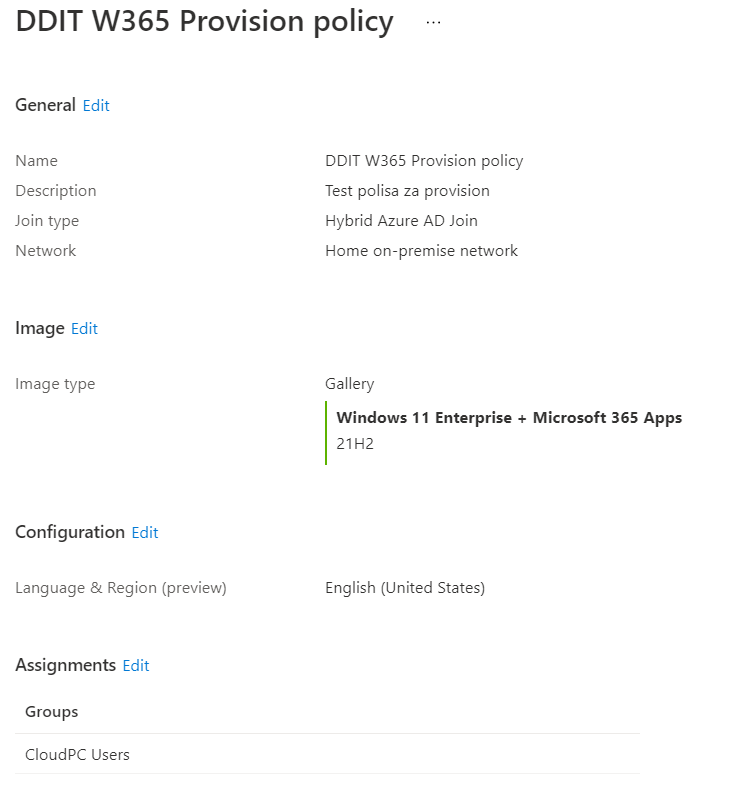
After you passed network checks, you need to create provisioning policy. Creating provisioning policy is a simple task, if you have prepared everything in advance. Most important is to have properly configured and verified network connection as described before. In a first step, you need to configure provisioning policy name, select join type (in this scenario it should be Hybrid Azure AD Join) and select network connection that is correctly verified by EndPoint Manager. After selecting Azure virtual network connetion, you should choose image that you want to deploy to Windows 365 PC. You can choose your own image, or pre-created image from gallery. In the next step, you should choose language and group of users that this provision policy will be applied to. Remember, users in this group (Endpoint Manager group) should by users synced from your local AD DS to Azure AD.
After provisionig policy is created, if everything goes fine, provisioning of Windows 365 PC will start. After 15-20 minutes, user can go to windows365.microsoft.com and sign in with credentials for user account that is a member of group configured in provisioning policy. If Windows 365 policy is assigned to account, user will see the cloud PC as shown here:
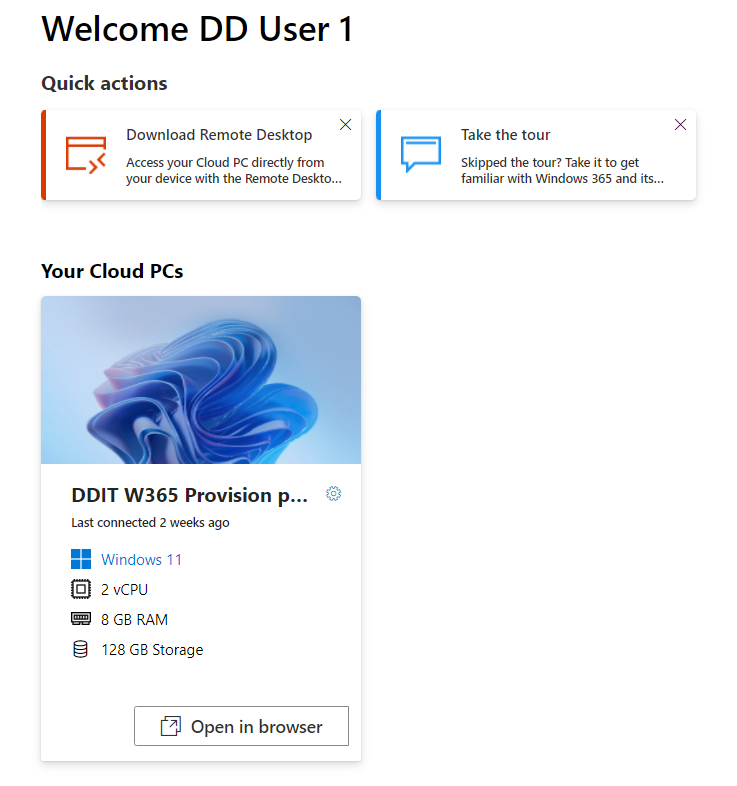
From this point, you can choose to directly sign in to Windows 365 PC by using browser, or you can download connection files to use in Remote Desktop app on PC, Android, Mac or iOS devices.